I've had a few mails recently advising that they were unable to post comments on my blog as word verification was switched on.
Being new to this blogging stuff I had no idea that this was switched on or could be switched off.
I have (hopefully) now turned off word verification
I'll be adding a few more of my cards soon
Cheryl x
Saturday, September 29, 2012

Sunday, September 16, 2012
Holiday Ornament Project
As soon as I saw this on the front of the Autumn/Winter catalogue I had to make it.
Thanks to Kate for showing me how to put the project together.
I used the holiday ornament stamps and framelits with lucky limeade and cherry cobbler ink.
The ribbon is cherry cobbler tulle ribbon.
The project is time consuming but the end result is well worth the effort

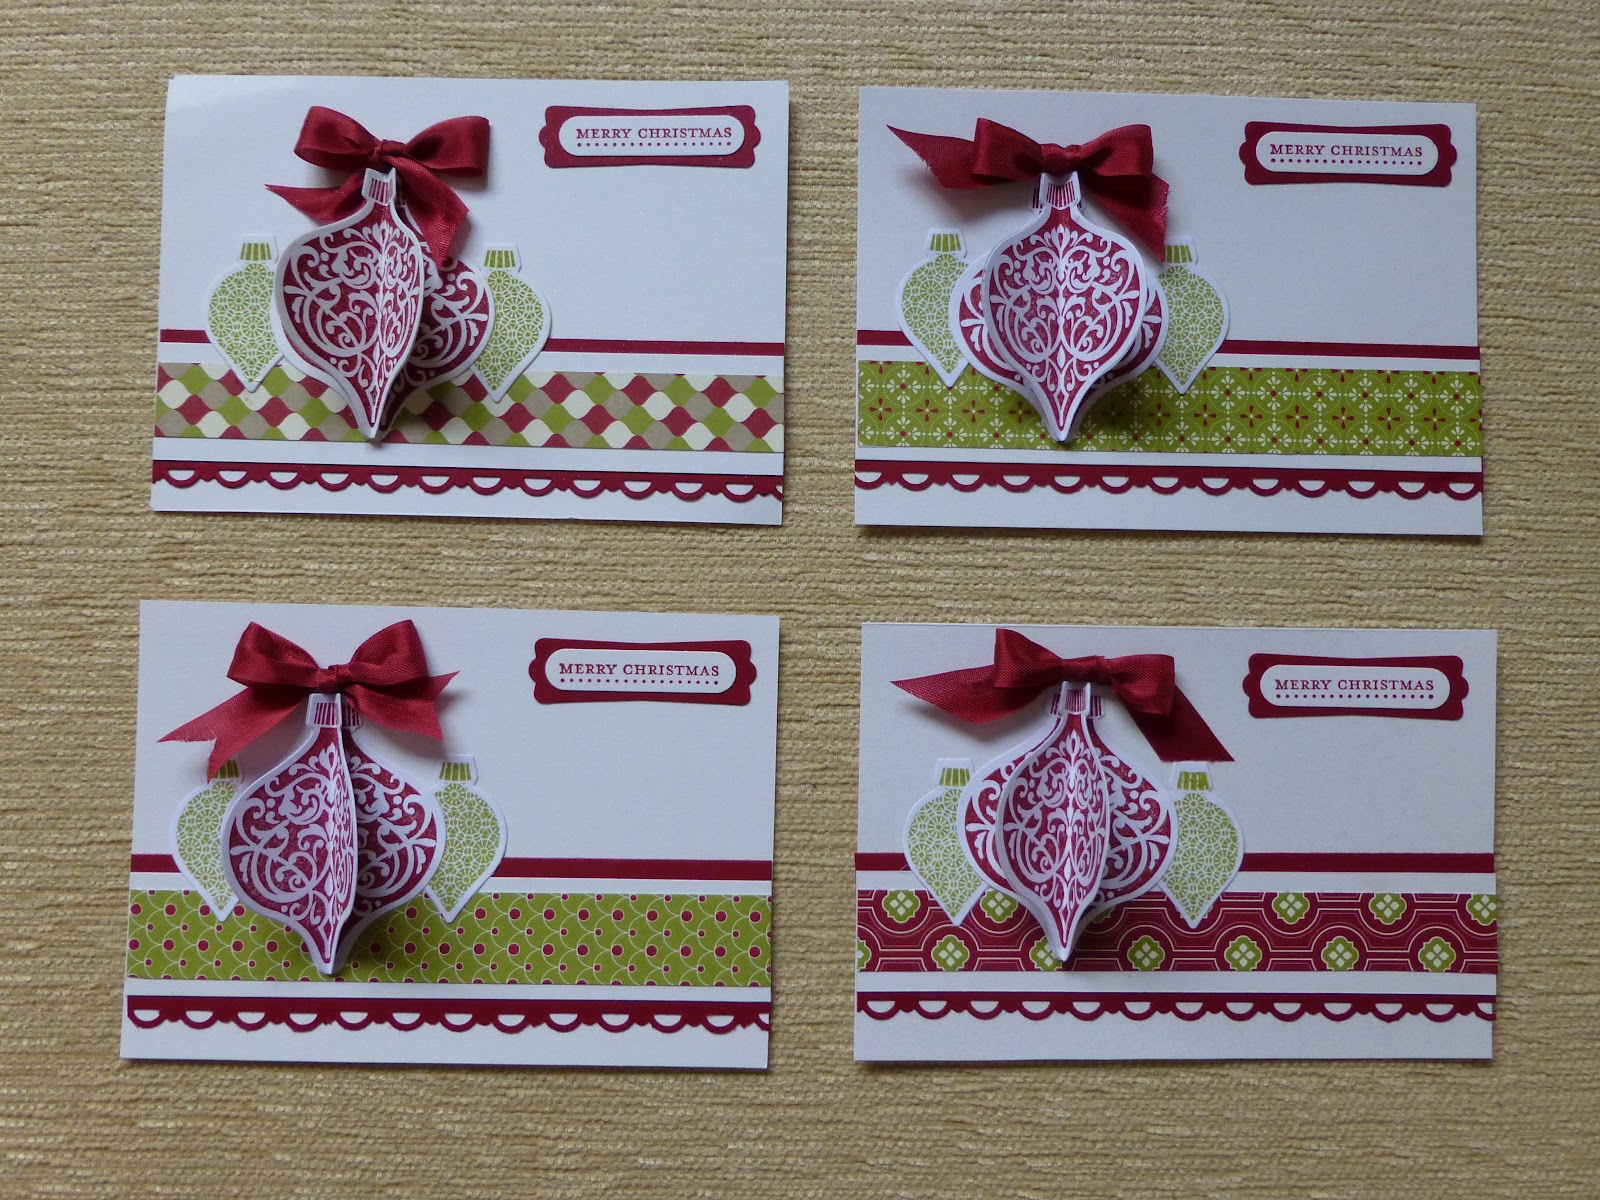
Holiday Ornaments Swap
Here are four of my latest swaps. I've used a white card sprayed with diluted frost white and platinum shimmer paint. The ornaments are stamped with lucky limeade and cherry cobbler and cut out with the matching holiday ornaments framelits, topped with a cherry cobbler ribbon bow.
The patterned papers are from festival of prints. I used 4 different papers along the same theme. The red trim is cherry cobbler card, cut using scallop trim border punch (one that I use a lot !)
The sentiment is cherry cobbler cobbler ink, stamped with Teeny Tiny Sentiments and cut out with the word window punch. The cherry cobbler mat was cut using the modern label punch.
Friday, August 31, 2012
Order Placed !
Ive spent this morning placing the first of many orders from the new Stampin' Up! catalogue. Today is the first day of the Autumn / Winter catalogue.
I'm hoping that the order is waiting for me when I get back from holiday.
Cant wait !
I'm hoping that the order is waiting for me when I get back from holiday.
Cant wait !
Sunday, August 26, 2012
The Box
Last Saturday I went to a class held by Sara, Jan and Hazel. One of the projects was to make an envelope box using the simply scored board. I've avoided making envelopes for the last twelve years but the board makes it so easy. Thanks ladies!
Start with a 12 x 12 sheet of card on the diagonal board. Score at 4 1/2 and 6 inches as shown below.

Turn the card by 90 degrees and score again. Repeat until all four sides are scored. It should look like this.

I've shaded the areas that need to be cut and removed. I've highlighted in pink where you need to cut along two of the lines.

It should now look like this.

I've written on the picture below but its a bit small to see so I will try to explain. The pointed bit at the top is going to be the top flap of your envelope box. The pointed bit at the bottom is going to be the bottom flap. I have marked two of the sides at the top edge with cross hatchings. This is to remove a 1/4 of an inch so the back of the box is a bit lower. You may wish to trim a bit more off but try taking this amount off first.

Crease along all the scored lines with a bone folder. You are now ready to start folding the box. Bring the side flaps in and fold the tabs in, as shown below.

Now fold the bottom flap up. I prefer to stick using wet glue so you have chance to get it all straight. Sorry about the print on the card but I've used the backing card from a pack of designer paper. Your box is now ready to decorate.
I hope the instructions are easy to follow. Please leave me feedback and let me know if I have made any mistakes. Its also nice to know I'm not talking to myself too - lol

Folding Card
A few weeks ago my crafting friends Chris and Kate took me to a SU class run by Julie Kettlewell. Julie credited the design to Chris Chamberlain. Thanks ladies!
I made another version and took this along to our team meeting. I had a lot of requests to show how it was made. First, here's the box and the card. I will show you how to make the flower later on.


To make the card I am using the Simply scored board and scoring tool. Take a 12 x 12 inch (30cm) paper and mark both sides 3 inches in from the edge.

Turn it through 90 degrees and score again so you have scored all four sides 3 inches from the edge.


When you have finished it should look like this.

Now score a diagonal line on each of the four corner squares as shown below.

When you have scored all four outer squares it should look like this.

Fold along each scored line backwards and forwards using a bone folder. You should now be able to fold your card to look like this.

To decorate the inside cut two 10 x 10 cm squares diagonally. Cut eight 7 x 7 cm squares diagonally. I have used contrasting papers from the same designer paper series. Decorate the centre panel as desired.
Turn the card over to decorate the reverse. Cut two 10 x 10 cm squares.
To make the belly band cut a piece of card 30.5 cm x 4 cm. Decorate and adhere a 20cm length of ribbon to each end.
I will put instruction on how to make the box later.
I made another version and took this along to our team meeting. I had a lot of requests to show how it was made. First, here's the box and the card. I will show you how to make the flower later on.


To make the card I am using the Simply scored board and scoring tool. Take a 12 x 12 inch (30cm) paper and mark both sides 3 inches in from the edge.

Turn it through 90 degrees and score again so you have scored all four sides 3 inches from the edge.

Put the diagonal scoring plate on the simply scored board. Score diagonally from centre to centre of each side as shown below.

When you have finished it should look like this.

Now score a diagonal line on each of the four corner squares as shown below.

When you have scored all four outer squares it should look like this.

Fold along each scored line backwards and forwards using a bone folder. You should now be able to fold your card to look like this.

To decorate the inside cut two 10 x 10 cm squares diagonally. Cut eight 7 x 7 cm squares diagonally. I have used contrasting papers from the same designer paper series. Decorate the centre panel as desired.
Turn the card over to decorate the reverse. Cut two 10 x 10 cm squares.
To make the belly band cut a piece of card 30.5 cm x 4 cm. Decorate and adhere a 20cm length of ribbon to each end.
I will put instruction on how to make the box later.
Friday, August 17, 2012
Another Tri Shutter Card
I seem to be addicted to making these cards
Flower is from build a blossom and paper is attic boutique
Butterflies are from the butterfly embosslet die


Flower is from build a blossom and paper is attic boutique
Butterflies are from the butterfly embosslet die


Subscribe to:
Posts (Atom)